Tampilkan postingan dengan label some. Tampilkan semua postingan

Jumat, 13 Mei 2016

yes we do repairs

,
ive always felt that a craftsman should fix stuff.  particularly stuff that is important to people who really like the stuff that is broken.  it might be a family piece, like this one, and have sentimental value, or it could be just a nice piece of furniture with a problem here or there, looking for the good life.  also, as a 
craftsperson, where else are you going to get to work on pieces like this one if you automatically just say
"i dont do repairs"  .. i mean, check this out .. fantastic unrestrained inlay work .. probably 18th century?  definitely english, as its owner is.  anyway, this was an onsite job, particularly enjoyable because we have been discussing fixing it off and on for, literally, years. click the photo to enlarge it.
all done today ... check that one out.  ready for the next hundred years.
weve had a run of repairs lately .. heres a shaker like cabinet that had no pulls, a funky fastener on the latch, a big water streak down the front of it and some shelves inside which we removed and replaced with a rod for hanging clothes.  its got some charm now.
and how often do you see a paper mache tilt top table?  never knew there was such a  thing.
love the scrap abalone oval, what would you call it?,  an applique?
this one had a painting fall on it .. that broke the paper base where the column screwed in. we also added a new catch where before the hinged block was screwed together so it couldnt flip up
technically, this wasnt a repair.  we just made a new base for the top.  the center of the table is a square of reclaimed french parquet floor.  the real thing!  hand hewn from solid wood, with a clever, rustic, mechanism that changes it from a 44 " square to a 62" round
here you can see the mechanism and the hand hewn nature of the original floor
tah dah!  the top is darker, and the base is lighter, in real life ... overhead florescent lights ..
another nostalgic funky family piece .. had a big crack in the side and back, and the two front feet and one of the back feet were loose and had to be removed and reset.
havent seen it yet with all the drawers.  only one drawer needed work
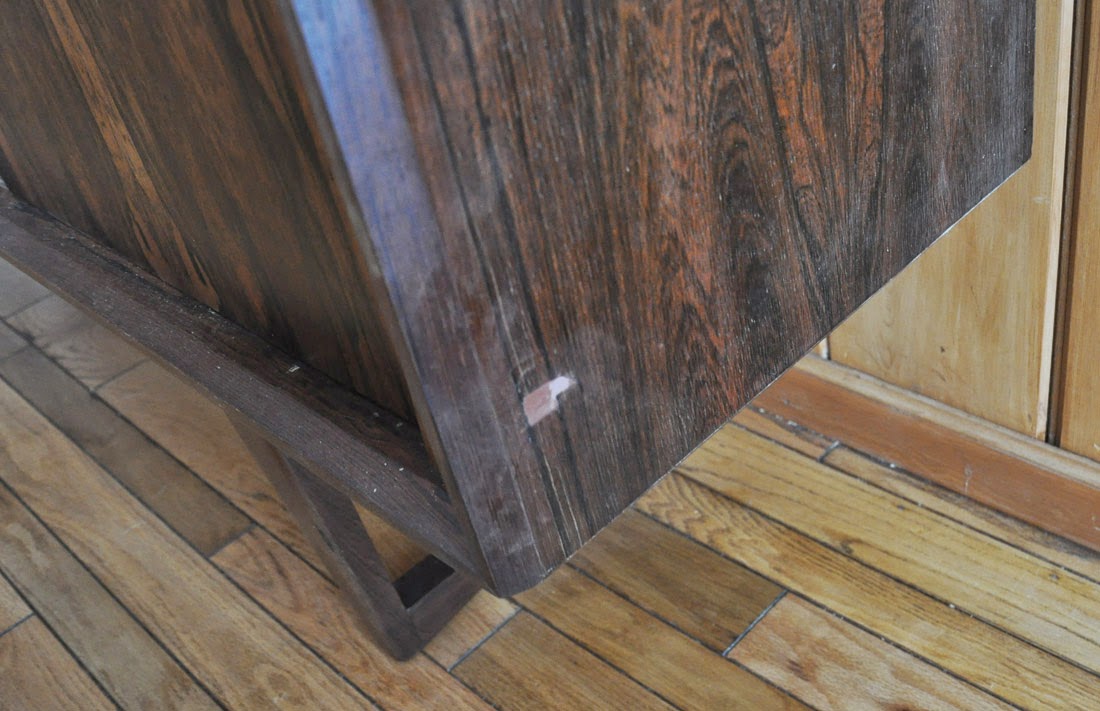
and this piece ... holy moly !  braziliab rosewood danish modern, damaged in shipping.  another onsite repair
cool piece ..
loved the interior bar detail and and way they cut the doors with the angles on them..
only the left one is open enough to see that.
better now, not perfect, but better
and we recently did six of these .. removing worn out brass casters on the front legs,
and turning new balled feet for the front legs
this is the connector from the trestle table below

as you can see in the photo below, the wedge grounded out on the edge of the hole before the table tightened up.  we squared up the inside edge and made new wedges.  its solid as a rock now.
we also added a foot to each end to make it a 12 table
and were working slowly on the doors below ... engineering a frame to hang them .. interesting challenge. they are too short, and too wide for the hole.  i have a plan ...
and weve got a very cool 12 foot walnut table going too .. more on that later

almost forgot this one ... it had a very clever sliding dovetail joint between the back leg and the 1/2" thick top rail.  had to trim off one side and reglue .. should be fine .. its part of a daily use kitchen set ..


Read more

Kamis, 12 Mei 2016

Some pouches and purses of the St Thomasguild part I

,
The kind of medieval pouches shown in a previous blogpost, as well as those described in the catalogue of medieval textiles from the treasury of the St. Servatius church in Maastricht, the Netherlands (see photo below) did inspire Anne to make some pouches as well.

A 14th century pouch made from four pieces of Italian lampas silk (red/green/white with gold threads) with red pompoms. The pouch was made from four downward tapered segments, of which two were cut out from the same repeated pattern (birds and other animals). The leather lining is connected to the outer fabric with the seam covered with a green braid. The attachment and closing cord of the bag is also made of a green braid. The pompoms are attached to the side and bottom of the pouch. 16 cm height, 18 cm width. Image from the book Mittelalterlichen Textilien von St. Servatius in Maastricht by A. Stauffer.


Annes version of this pouch is smaller (7 cm height, 8 cm wide) and made of embroidered silk. Blue silken pompoms are attached at the four corners, as well as at the drawstrings. The inside is made of a cream-coloured silk. We would like to place some remains of St. Thomas (or fragments of his clothes) inside the pouch, like that of the reliquary pouch from Maaseik (Belgium), but have not found some yet. Early next year, Anne will visit India and perhaps she can locate a something of him (for instance, a brick from the palace that St. Thomas built or a tooth from the dog who brought the hand of the cup-bearer that offended St. Thomas at the wedding feast).


Different views of Annes pompom pouch.

 
Six textile fragments and a small leather purse: the contents of a reliquary pouch from the shrine of Johannes Nepomucenus from the St. Catharina church in Maaseik, Belgium. The pouch (right) and fragments (left) are dated between 1200 and 1400. The pouch itself is made of silk and measures 11 cm (height) by 9 cm (width). At the sides are small metal beads or pearls. Photos from KIK IRPA, Brussels, Belgium.

Another small purse (also 7 cm height by 8 cm wide) that Anne made of some leftover red silk with a cream-coloured pattern. The inside is the same cream silk as the pompom pouch. The drawstring consists of two colours of silken embroidery thread, and made as medieval rope (but using a cordless power drill to speed up the process).


Annes second pouch. you can clearly see the holes at the top of the pouch through which the drawstring goes.  
The pouch closes by pulling the string simultaneously at the opposite sides.

The Maastricht brickstitch pouch with silk stitching on linen ground. Yarn colours are red (now beige), bright blue and gold-plated silver. Inside of the pouch is red taftsilk. Height 9 cm, width 14 cm. Image from the book Mittelalterlichen Textilien von St. Servatius in Maastricht by A. Stauffer.
 
The following green and red pouch is based on the brickstitch pattern that is found on a reliquary pouch (dated around 1300) in the Maastricht treasury. A handout of this pattern (used to embroider the pouch) can be found at the excellent Medieval Silkwork blog. This pouch has been Annes first attempt at brickstitch embroidery. The pouch measures 10 by 13 cm, while the actual brickstitch area is (twice) 10 by 10 cm. The inside and the border are made of red silk. The pouch closes with a two-coloured drawstring, made the same way as described above. The pouch now holds a collection of embroidery yarn and utensils. An interesting post on medieval embroidery yarn and the modern equivalents is also found at the Medieval Silkwork blog.


Annes version of the Maastricht brickstitch pattern pouch. Both sides are embroidered with the brickstitch pattern.


Read more

Some wooden needle cases and other textile working tools

,
At our woodworking course we have a new electric lathe, and I wanted to try this machine to make some wooden needle cases. Such needle cases existed in bone and metal forms in medieval times, and likely as well in wood - but this is difficult to prove as the items are rather small and relatively fragile. The needle case consisted of a hollow wooden cover, in which a hollow wooden bobbin sits, in which needles can be stored. In fact, it is a complete sewing kit.

Some sewing stuff. Three wooden needle cases with bobbins: two made of walnut, one of cherry, as well as three loose wooden bobbins of cherry and beech.

Making the needle case was a wondrous experience. It went smooth and fast on the new machine. I used some walnut stock to make the basic wooden rod (around 25 mm) on the lathe. Then I divided the rod into four pieces: two cases and two bobbins. A relatively simple task to do. I hollowed the turned cases out using a drill press with a 15 mm forstner bit, but this could also have been done on the lathe. In fact, making the holes for the needles in the bobbin was done on the lathe with the bobbin fixed in the chuck and the drill in the dead centre of the tail stock.

Here the two parts of the needle case can be seen; The bobbin with the hole for the needles, and the wooden case for the bobbin. Ideally, a cord can be attached the the bobbin and the case, so the complete set can be attached to a belt.


The two walnut needle cases closed. The top one is finished with beeswax, bottom one with linseed oil. 

Previously, I had made such a needle case from cherry wood on an old unstable lathe, and made the holes using a centre bit on a hand drilling machine. This was a far more tricky process with an only 50% success rate.

 The cherry needle box. A piece of wool is used to plug the needle hole of the bobbin.

Previously, I also made some more bobbins from beech and cherry.


  Three empty bobbins.

And two full ones.


And a wooden pin or stiletto of beech. The pin is used as a help for making eyelets. Pushing it through the fabric creates a hole for the eyelet by forcing the weave apart.


Some other textile working tools shown on the first photo are a pair of scissors (bought at Glimmingehus in Sweden) and a ring thimble. The thimble is a 14th century original, now put back into use.

The ring thimble has retained a nice patina.
Read more

Rabu, 11 Mei 2016

in the time before blogging

,
i was recently looking for photos of a walk i had taken with friends to a waterfall, virtually in my backyard, when i stumbled across a folder of pictures from the good old days, in our case 2002 to 2006, back in the time before blogging you might say.  so, why not just share them to my picasa albums, and continue to add images to that folder as i go back through the archives ... my real photographer retired in 2001 or 2002, and  i was just figuring out the digital thing.  so, some of the images from those days are better than others, but some are actually quite up to snuff.  ill post a few below, just so you get an idea of what we were up to back then (more of the same, but different styles) but you can view the real folder with about 80 photos at the link below ...

some images from 2003, 2004 and 2005    click on that first one and scroll through them with the arrow keys ... if you have a good connection, you can whip right through them ...   enjoy!
 a cherry and curly maple corner cupboard ...  it had a tv in it actually ..
 
a close up of the inlay in the side table above
 a custom audio/video cabinet
 a small mahogany console
 a mahogany porch table and some aluminum chairs

  a walnut partners desk


 a 14, one piece of bubinga table and chairs
and a sideboard made from the cut off

more images at the link above ...below, the waterfall pictures


Read more
 

Blog Woodworking Plans Copyright © 2016 -- Powered by Blogger